The Woden Design Dunideer
 Following my Solo 103 build, I decided that I had sufficient confidence to tackle a project with some degree of internal complexity. Since I had never heard a back-loaded horn, I was very interested to see what they were all about. I chose the Woden Dunideer as my first attempt for a few reasons. First, it is not too big, and second, the internals are all right-angles. I am getting a lot more comfortable with angle cuts but right-angles are still comforting. This design is 60 x 6 x 8″ in size, and uses a tiny little Mark Audio Alpair 6 – a 3″ metal cone driver. Here is a description of the Dunideer from the designer, Scott Lindgren:
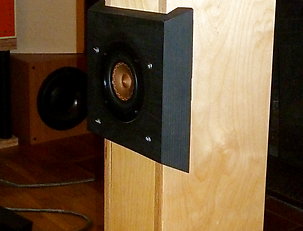
Essentially the Dunideer is a compact double-mouth back-horn for the Mark Audio Alpair 6. It’s primarily intended for use with small piece acoustic music / vocals at modest levels in small-medium rooms. Although not an ideal first speaker project, it was also designed to be a fairly easy build, and when suitably finished, to look reasonably elegant (for a speaker) in-room. The over-under mouth configuration provides a quasi MTM radiation pattern through the cabinet’s operating bandwidth, and subjectively makes for a large soundstage given the size of the driver.
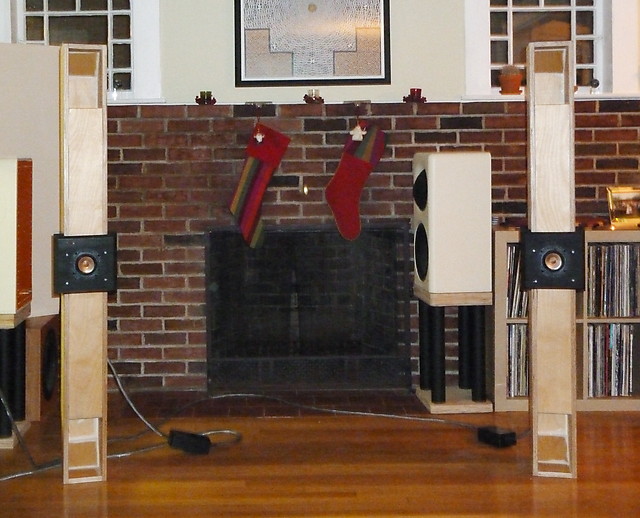
Some may think they are a bit tall, but due to their slimness they do not dominate the room… too much. Luckily for me she does not really complain about my audio gear. I was told that after these are complete one pair would need to leave the living room which I think is more than reasonable. I guess…
Technicalish Introduction
The purpose of a horn of this type is to increase the loading of the loudspeaker. The high impedance of the loudspeaker and the low impedance of air create a large difference between the source and the load. This results in most of the energy delivered to the loudspeaker being lost as heat in the voicecoil of the driver. Increasing loading increases the efficiency of the system, thus also increasing output. This problem is greater at lower frequencies so you can see how a horn can be used to make a loudspeaker play lower – see Reference 1.
Back-loaded (AKA rear-loaded) horns are loudspeakers that have a horn attached to the rear of the driver. This system is more complicated than a front-loaded horn because there are two sources radiating into the room, the driver and the horn mouth – see Reference 2. Horns can come in a wide variety of expansions but the Dunideer is of the catenoid variety. According to Scott, the designer, this is an uncommon expansion. For those not familiar with a catenoid, it is the three-dimensional shape generated by rotating a catenary curve, which is basically what a chain hanging from two posts looks like if it is only affected by its own weight. Obviously this loudspeaker does not have round walls so it’s more like a “hanging chain” and an inverted “hanging chain” on top – Reference 3. A quick search found that one of a catenoidal horn’s advantages over conical or exponential horns is their higher efficiency – see Reference 4.
Methods and Materials
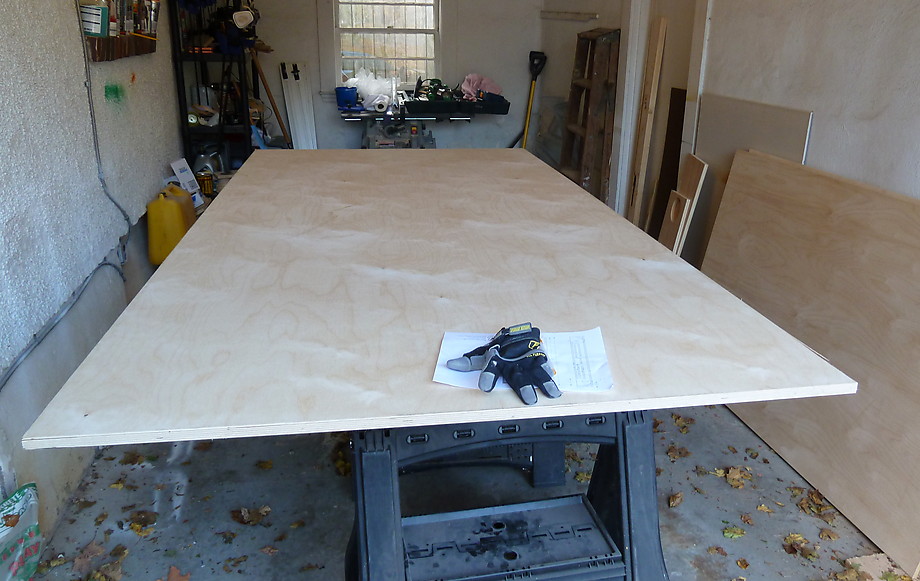
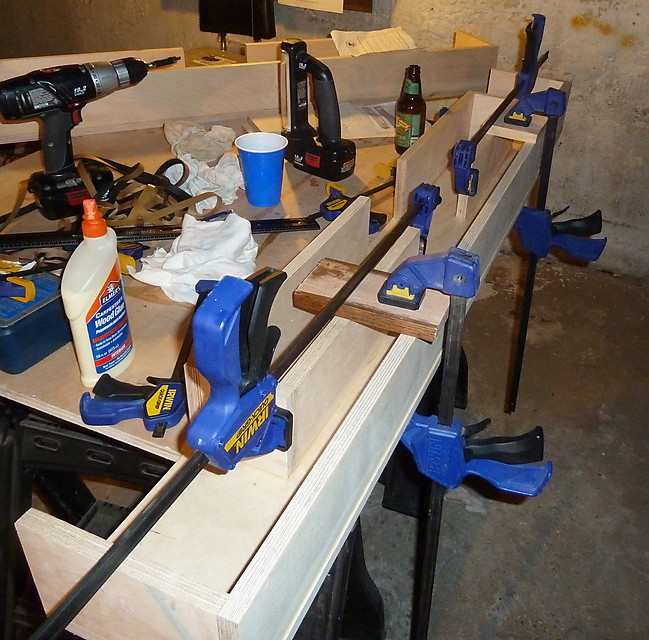
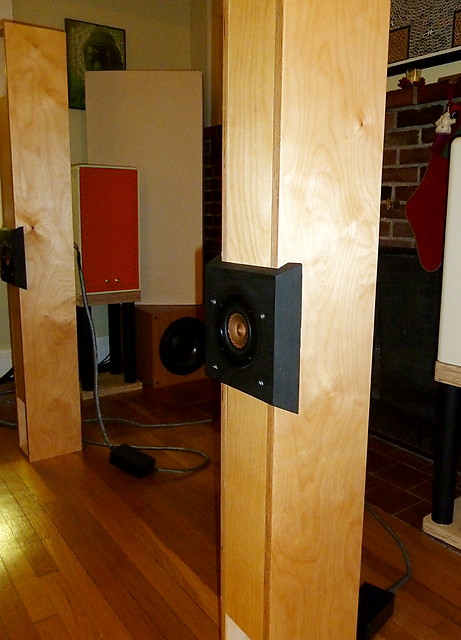
I again used 3/4″ Baltic birch ply for this project, but this time I was able to convince a friend to lend me his pickup, and so I bought four sheets: two 4×8′ sheets of 3/4″ and two 5×5’sheets of 5/8″. This project only took one sheet so I have plenty for my next few projects. Like last time, I am just using wood glue with no brads. Depending on the precision of the internal panels, I planned on making a game-time decision on whether to use straight-up wood glue on the final side, or to use screws and some sort of sealant.
(See below for images of build progress.)
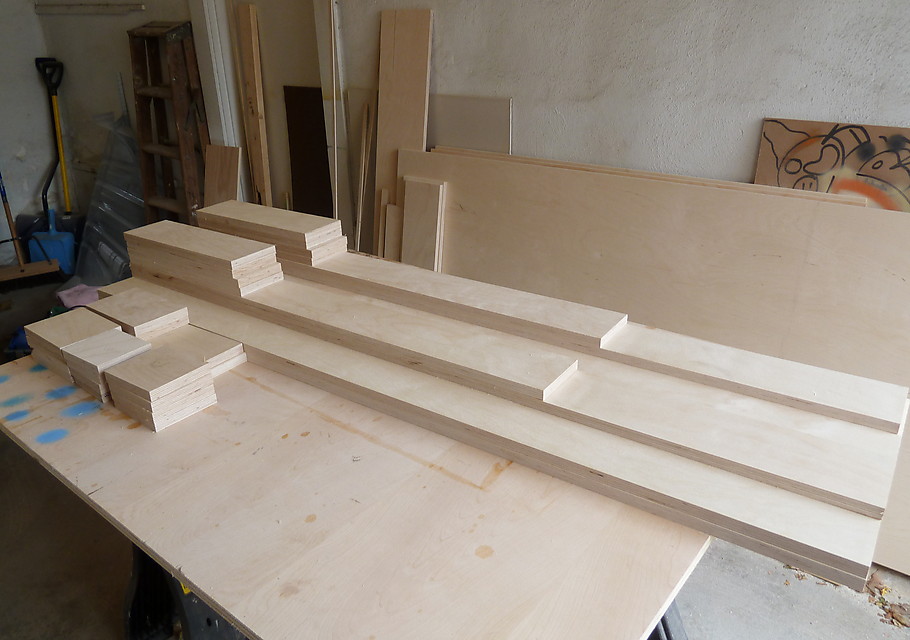
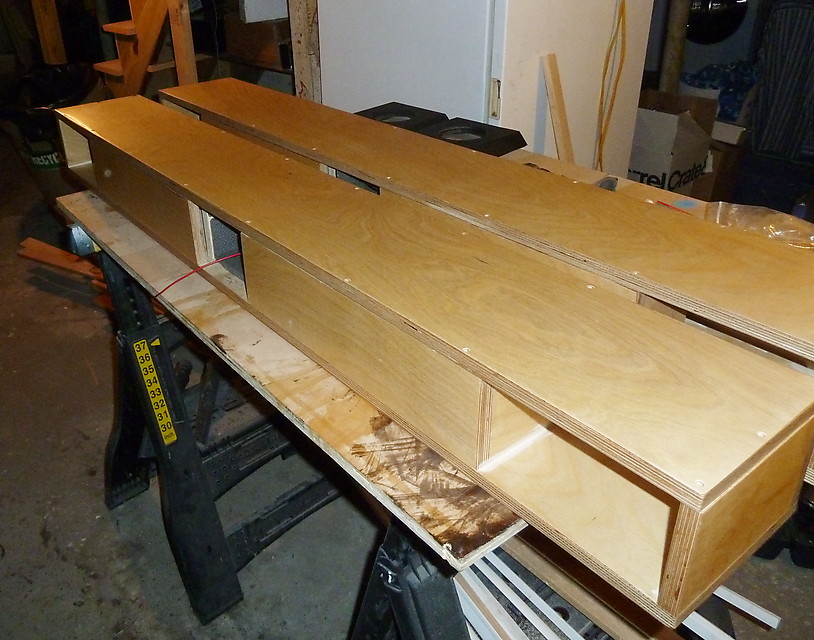
Now that I had a real man-size sheet of plywood, I went back to my Eureka Zone EZsmart system to cut it into planks. This project required the majority of a 4×8′ sheet, with little room for error when cutting the larger planks. Amazingly, I made no mistakes on the cuts and did not have to use any “backup” wood. I was able to get all the panels cut up in one afternoon while taking my time. This tends to be the longest single stretch of time that I need for my builds. After that, assembly is usually dragged out over a few weeks while letting glue dry and taking it slow and steady.
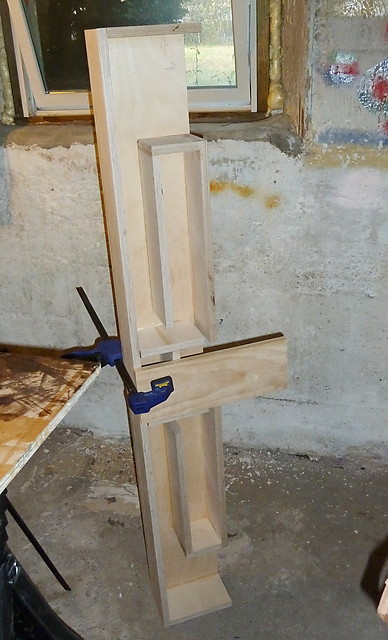
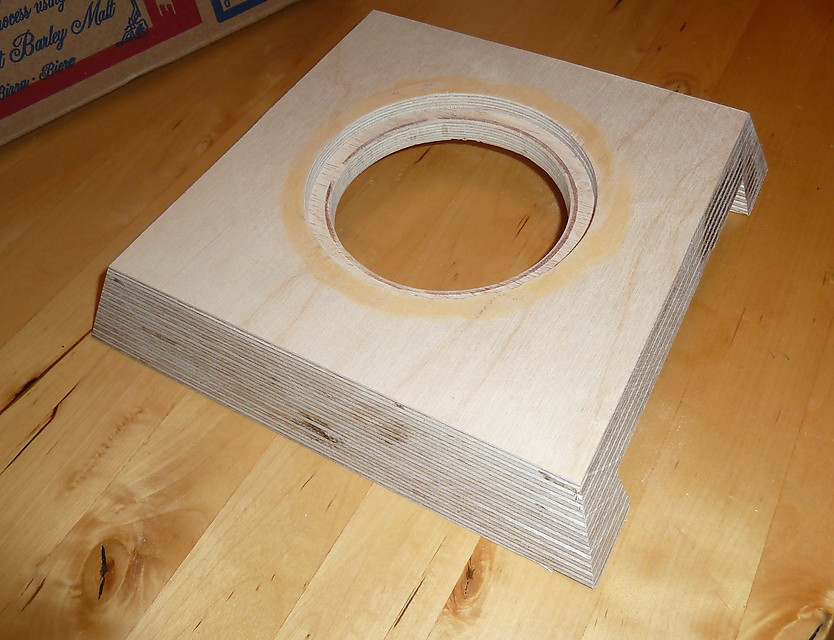
Winter had finally arrived, so after cutting I brought all the panels down to my cramped basement for clamping and gluing. The only angle cut on these speakers is the deflectors in the horn mouth, so assembly was not much of an issue at all. I made one modification to the panels, which was splitting the front baffle into two pieces, allowing a gap for the addition of the supra-baffle. The front panel is pretty narrow and setting the driver in would be very difficult for someone with my limited experience using a router. It was suggested that a supra-baffle – a slightly proud baffle of a size a bit larger than the cabinet itself – would make mounting the driver much easier.
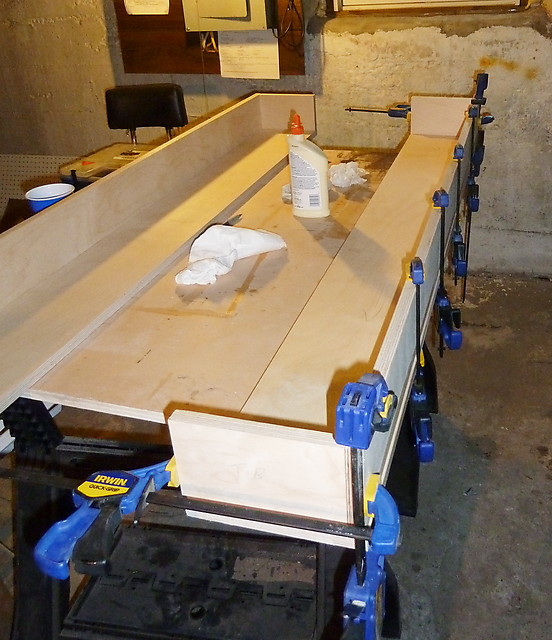
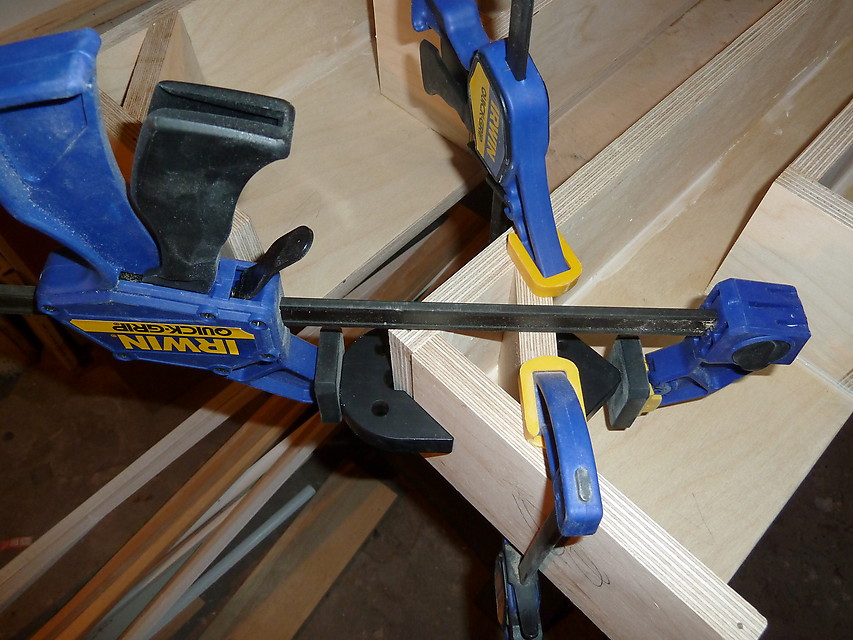
I started glue-up with the external panels, with the tops and bottoms being first. This was because I wanted them to be flush to the front. If the back was a bit off due to accuracy issues then no worries. Next the backs were attached with the two front panels following. The front panels do not abut any other external panels so getting them nice and flush was no issue. Once all the outside panels were mounted I began on the inside. I first mocked up both speakers to ensure that the internal measurements were correct. Once I was comfortable that everything was going to fit properly and within a good tolerance, I started at the mouths and worked my way in, one panel at a time.
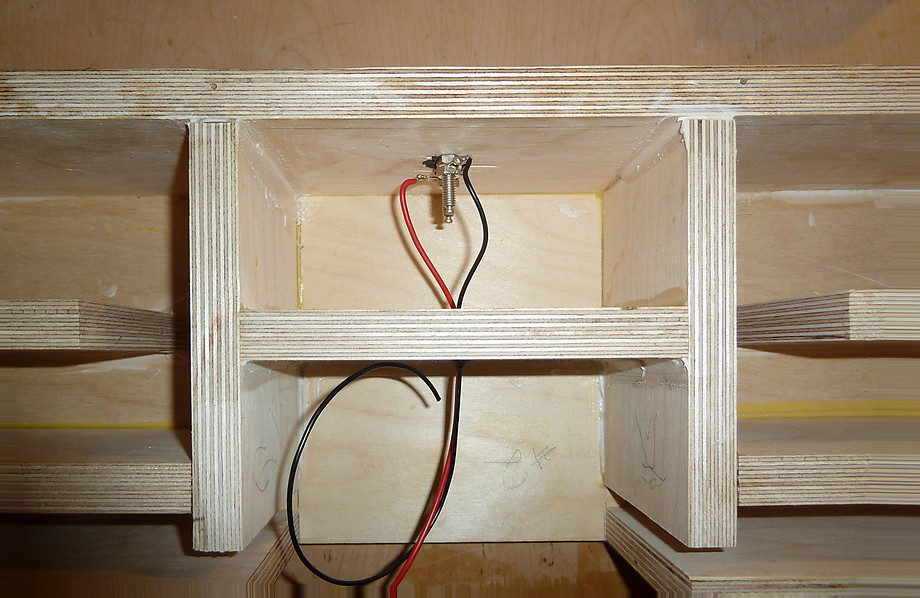
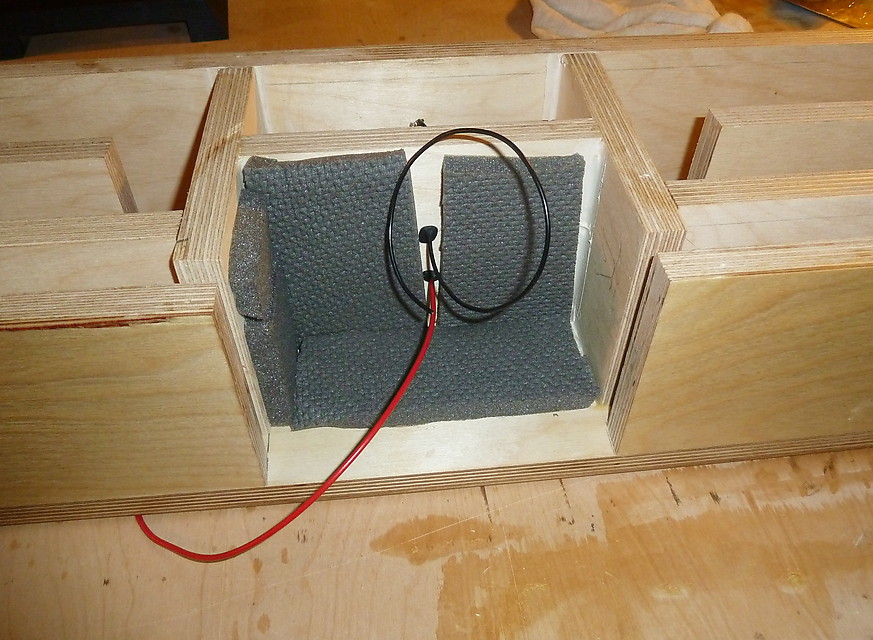
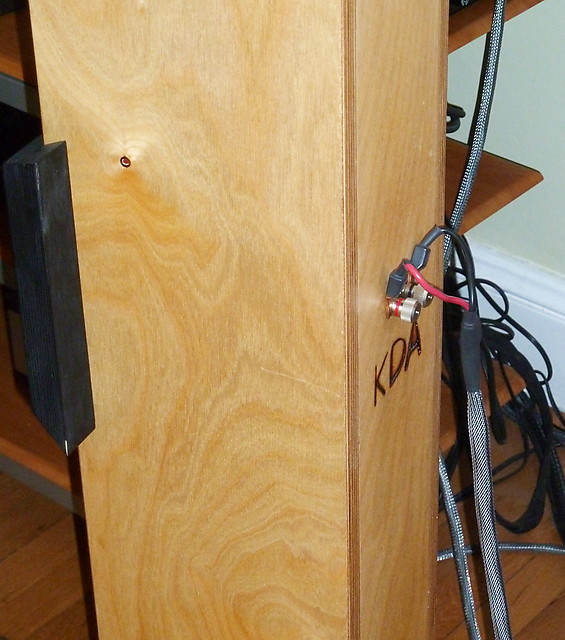
With a few of the internal panels, I was not happy with the angle of the short end. They were obviously not 90° because they did not contact the adjoining panel perfectly. They were not too far off, maybe a sixteenth of an inch at the most. To fix this I used an RTV type of sealer/adhesive generously on those ends. Once all the internal panels were mounted, the only thing left to do on the inside was drill some holes for the speaker wire and binding posts. I put the binding posts directly back from the driver with the wire going through the back of the compression chamber and then the back panel. I used the same sturdy cheap Dayton Audio binding posts from Parts Express as I did with the Solo 103 build. Even though I made the wire holes nice and snug I still used some speaker gasket putty around them to ensure a good seal.
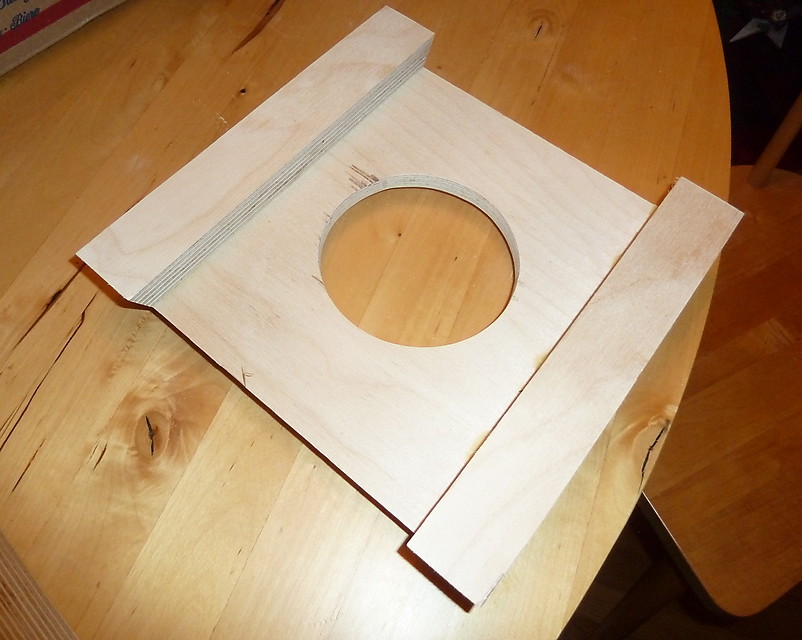
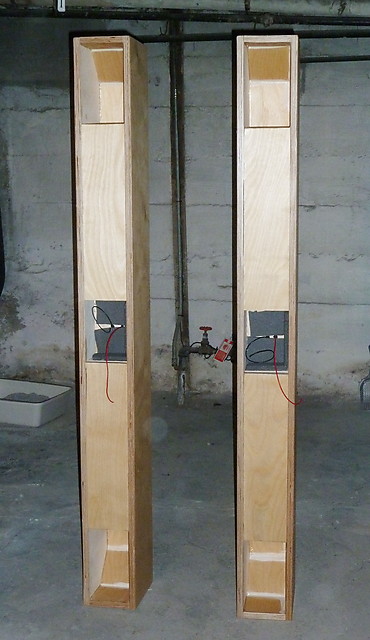
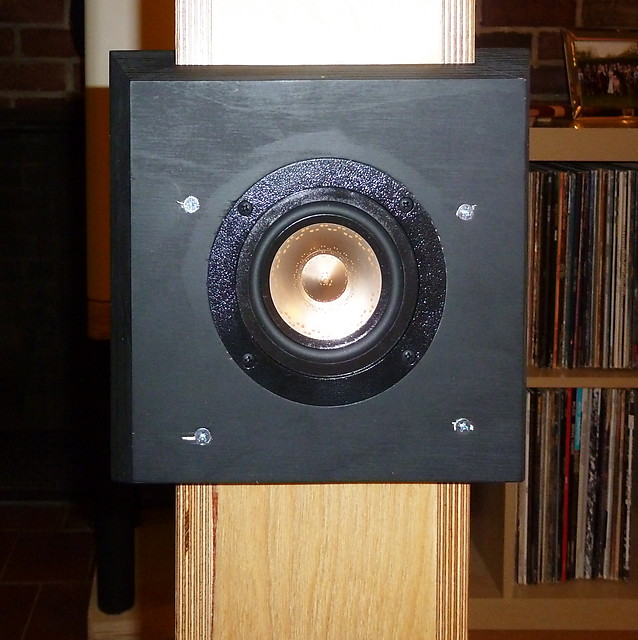
Finally, the supra-baffle was the only thing left to fabricate. I had been putting it off because I am still a bit uncomfortable with the router, and even with the Jasper circle jig my results have varied. To make the baffle I cut a square panel and two strips of the same length and about 1.5″ wide. I then routed out the holes which again I struggled with. I always seem to get a “horn” and am not sure what I am doing wrong. Practice makes perfect I guess. Once the holes were cut I mocked up the drivers to see how they fit. Lucky me – they did not fit, the hole was too small. It was not off by much so I put some sandpaper on the end of a dowel and went to town. Once the drivers fit nice and snug I glued the strips to the underside edges of the baffle.
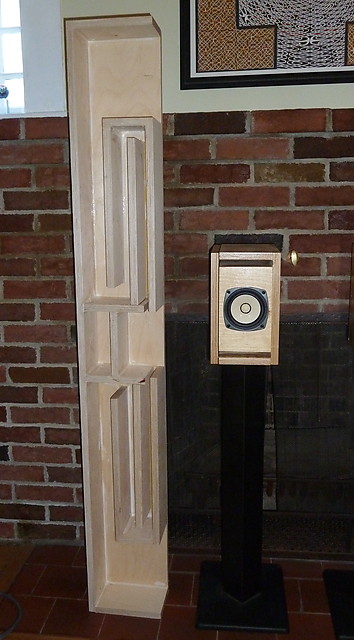
Once dried, I set my table saw to a 60° angle and cut the baffle into a flat-topped pyramid shape. I had some chip-out around the driver hole that I was not very happy with that happened when the bit came on the cross-cut. I tried using some vinyl wood filler but it looked like crap, so to cover up this ugliness the baffles had to be painted. I had some cool Rustoleum Industrial flat black that I thought would contrast nicely with the natural wood. Once the paint dried, I mounted up the drivers and set them aside for the final assembly.
(Click on images to view full size.)


Finishing
To prepare for finishing, I sanded the surfaces to 320 grit by starting at 120 and moving on to 220 and 320. This really made you see what the Baltic Birch can look like. It was very nice, smooth and ready for paint. I did make a few errors when sanding… shocking. The edges and first layer of the wood do have a tendency to want to chip off. I had one major chunk chip off but I was able to sand it down nicely. It’s also near the base of the speakers so no one will notice. Maybe I should have used a router with a round over bit on all the edges first but I did not want to screw up all my hard work. Anyhoo… they were definitely “good enough” for me.
Now that it is winter, my DIY activities have become limited in many aspects. First off, I generally do not like cutting wood in the freezing cold; and secondly, painting and other activities that generate noxious fumes become a major issue. My house is small with a suspended wooden floor, so even a few puffs of spray paint stink up the whole house. So, stinky activities must be done outside or (worst case) on the steps of the bulkhead in my “booth.”
This unavoidable situation had me looking for some non-stinky options for finishing these speakers. With a little probing on the forums, I was informed of a product line from a company called Tried and True Wood Finishes. These finishes are based on polymerized linseed oil. They contain no organic solvents or heavy metal drying agents. This all sounded great to my naturalist say-no-to-chemicals sensibilities. I picked up a can of the original formula at my local Woodcraft store, which turned out to also contain beeswax as well as the polymerized linseed oil.
 The instructions for the finish said to put a very thin coat on the surface, let sit for one hour, and then wipe the surface very clean and let dry overnight; and repeat as necessary. I put three coats on in this manner and was happy with the way it was looking. I then let them dry for a few days and applied three coats of quality carnauba furniture wax. Overall I was quite jazzed with the finish. It is very nice and has a fantastic luster. The funny thing is a few days later while surfing the web I found tons of negative posts concerning Tried and True on woodworking forums. Most were in regards to drying time. Did I put the wax on too soon? Shit. Well regardless if I did or not, everything looks great. The speakers are not oily to the touch and I am happy with them. Overall I do not think the people with the complaints valued what Tried and True had to offer versus all the nasty solvent-based finishes. Maybe it’s not the best finish but a) people have been finishing furniture longer than these chemicals have been around and b) I am confident that my health and all living in my house are not at risk.
I again did not trust just wood glue when attaching the side to complete the speakers, but I did not want to use a big gasket like I had with the Solo 103s, so I used an RTV-like sealant/adhesive. I had pre-drilled all the screw holes prior to finishing but did – as usual – have a few “incidents” with this step. In a few spots when I inserted a screw into the hole a little piece of internal ply sort of ejected itself from the edge of the wood. This left a little 0.5 cm blade of birch that needed to be cut off. I had the drill set to not go too deep, which worked great in most places, but in others the screw wanted to go right through the wood. I guess I had it set too high. Finally the RTV sealant squeezed out from the gaps and made quite a mess that was a PITA to clean up. Luckily it did not stick well to the finished surface. Persistent rubbing with a clean cloth got it all off sufficiently.
All that was left to do now was to solder the drivers and attach the baffles. This went down with little drama, which was nice. Each baffle got four screws and I used silicone caulk to seal them so it could be removed if needed.
Overall I really like the look of these speakers. I have always had a soft spot for solid colors in contrast on natural wood grain, so the black baffle is pleasing to me. I think white may look better but the flat black is pretty slick. This plywood can really be cleaned up to be very visually appealing. I love the look of the plies on the ends; to me this is a great design feature. I successfully got the side panels to flush up nicely with the front baffle which is a good accomplishment for me. They are definitely one of those speakers you run your hand over when you walk by them – satiny smooth. I would also say that for a five-foot speaker they fit nicely in a room. I have not had any complaints from the lady of the house so they’ve got that going for them.
Listening
These speakers are advertised as suitable for chamber music and general small-scale types of music. I don’t listen much (at all) to classical music so I will not be able to report on their ability to play chamber music. I do have plenty of acoustic guitar music as well as minimalist electronic music so I can safely extrapolate that they will handle that stuff equally as well.
I started off with the Garcia, Grisman and Rice “The Pizza Tapes,” which is one of my favorite recordings. This is a session that was recorded at David Grisman’s studio in 1993. It’s called “The Pizza Tapes” because Jerry’s copy was stolen by a pizza delivery guy and leaked into the Dead scene. It is a great recording of these guys doing a bunch of classic and traditional songs. With a string trio like this these speakers really shine. They in no way ever seemed to lack extension in either direction.
In my house, there is one way for a speaker – no matter how it looks – to gain a pass into the living room. This is called the Ani Difranco Test. It is a very simple test: make Ani sound great and you are all good. Make her sound lackluster and you are in trouble. I find Ani to be fun test music because it has the driving acoustic guitar as well as some other fun textures. I usually start with “Both Hands” from her self-titled album. This track is great because it has minimalist yet powerful guitar with Ani singing. I really liked the focus of her voice along with the guitar encompassing her. The Dunideers got this right. On “Little Plastic Castles” from the album of the same name, Ani comes in with just her guitar. At about the 1:10 mark the song explodes with horns and a full band. When I listen to this song I want to be blown away by the shift from small to large sound. While these speakers will not blow you away, they will throw a huge soundstage that will satisfyingly bombard your senses. It was not really a fair fight though; Ani is right in the Dunideer’s wheelhouse.
One track that I had used to evaluate the Solo 103 speakers was Calexico’s “Alone Again Or” from the Convict Pool EP. This song always reminds me of the movie “Bottle Rocket” – which is a good thing – and it’s a great recording with some good aspects to focus in on for evaluation. Specifically, I was listening to the clapping, trumpet and guitar. With the Solo 103s the trumpet was missing something; it was missing that brassy sound. It was very pleasing and smooth as silk – but just a bit off. The Dunideer with the Mark Audio driver handled this a little better and sounded more like my reference Gedlee Nathan speakers. Both speakers handled the clapping in a very snappy, satisfying manner.
Comparing the Dunideer to the Solo 103 project is a tough one for me. I have an emotional attachment to both of them. One of my friends thought the Dunideer sounded livelier than the 103s. One big difference between the two is bass: the 103s require a sub in my opinion but I think many could get by without one with the Duni. I also think the Dunideers threw the larger, more impressive soundstage, and were definitely more dynamic. That said the 103s are more balanced, amazingly smooth, and totally disappear. I guess I will have to keep them both for now.
Conclusion
These are great speakers that I think many people could live with for a long time. I had a blast building them. I can’t wait to get better at cutting and finishing wood because I want to make some real slick boxes, although I am not sure what my next speaker project will be. Winter has arrived in full force and I just do not feel like being out in the garage. I think once spring arrives I will build the Pencil 10 for the Alpair 10 drivers. To tide me over for the winter I have a 6SN7 Aikido project going that I hope to finish by the spring.
References
- Kolbrek, Bjorn “Horn Theory: An Introduction, Part 1” 2008, http://www.audioxpress.com/magsdirx/ax/addenda/media/kolbrek2884.pdf
- Martin J. King, “Section 7.0 : Design of a Back Loaded Exponential Horn”, 2008, http://www.quarter-wave.com/Horns/Back_Horn.pdf
- http://en.wikipedia.org/wiki/Catenoid and http://en.wikipedia.org/wiki/Catenary
- Colin H. Hansen, Scott D. Snyder, “Active control of noise and vibration”, E&NF Spon, 1997, page 1178.


I dig your articles – thanks!
Kris,
nice to the point write up. One thing that has failed to be mentioned is the use of the P10 Mark Audio Alpair 6eN drivers as modded by Planet10 HiFi ( http://www.planet10-hifi.com ). I have experience with 3 different drivers modded by P10 and can say without hesitation or any reservations that the modded drivers are superior to the stock drivers in terms of resloution, soundstaging and the flat earther’s PRAT (not PRaT!) Pace, Rythm, Attack, and Timing.
Nice details regarding your personal experiences building the speakers, your practical considerations and listening comments.
Thanks Stew! The drivers are P10 modded and very nice indeed. Its hard for me to say they are better because I have never installed stock drivers in the Dunideers. I do trust they are based on my readings and the fact that Dave at P10 is a standup guy offering some really cool designs. He really gives a lot to the DIY community.
Kris,
Dave is a stand-up guy for sure (he also makes a very good cup of “Turkish” coffee, which in his case is actually Lebanese coffee). He is personally very generous with time and insights (as is Ruth) and help. His contribution to speaker modifications and complete speaker designs are quite significant, as well as Chris (cabinet construction and golden-eared speaker guy), and Daniel (young stud electronics design and build guy). There is a good group on that island of their’s.
I can tell you that in every instance where I have had the opportunity to compare the stock drivers to his modded ones, there has been a significant improvements. The “eN” drivers are modded by Dave, but based on the work and efforts (and patents) of Bud Pervine (of Onetics Corp.). Bud is a hell of a nice guy and very knowledgeable. His willingness to share ideas with the diy community is what (I think) makes the Internet audio forums (and specifically at http://www.diyaudio.com , where both he and Dave contribute huge amounts of time and effort responding to virtually any questions asked of them.)
Of course these are not the only guys out there providing huge resources to the diy types, but certainly in the top 5 or so of what has been out there regarding speaker design, and design in general.
The coffee usually carries the name of the country as a prefix. Turkish coffee in Turkey, Greek coffee in Greece, Basmotha in Arabia. Funnily enuff, in Cyprus, where they consider themselves greeker than the Greeks, they call it Turkish coffee. I was taught the art by a Cypriot.
Excellent review Kris.
dave